Squarespace Cleanup Session: Tips, Tricks, and Highlights From June 18 2026 Workshop
Today’s Squarespace Cleanup Session was such a fun and inspiring space.
Thank you to everyone who joined live. For those who could not make it, this blog walks through the exact tips, tricks, and conversations we covered so you can still follow along and apply the same improvements to your website.
I will be hosting these sessions every two months, so you will always have another chance to join, learn, and connect with other women building their digital presence. I will also send out everyone’s contact information separately so you can stay connected after the event.
This session focused on simple, practical ways to clean up your Squarespace website, improve your SEO, and feel more confident managing your own site.
What We Worked On During the Session
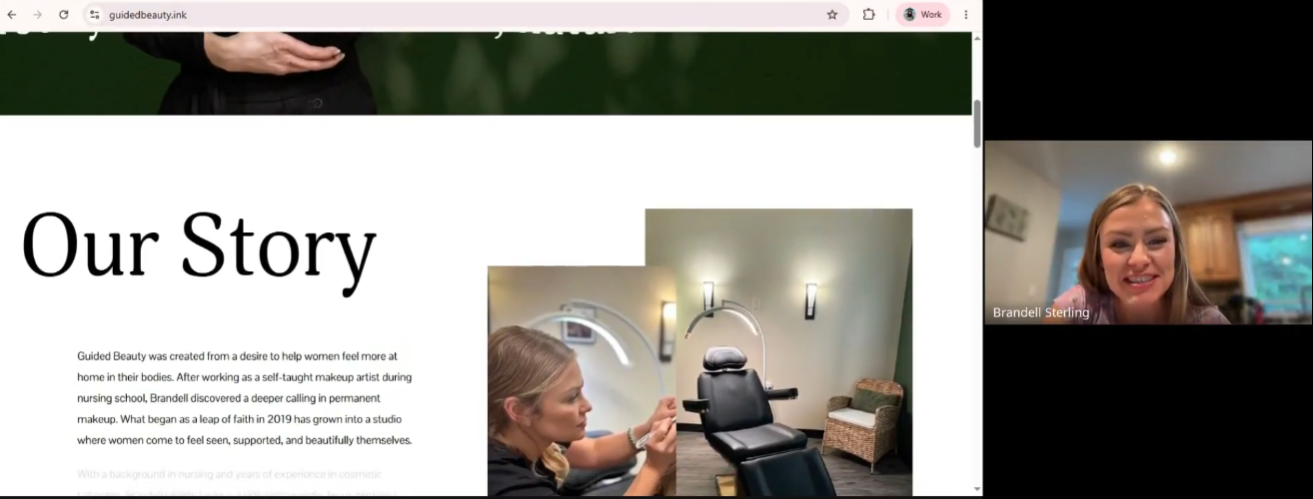
Build a Clean Digital Storefront the Smart Way
A clean digital storefront is one of the quickest ways to make your website feel more professional. During the Squarespace Cleanup Session, we talked about keeping your layout simple, clear, and easy to navigate so visitors instantly understand what you offer without confusion.
Most people try to fix their layout by dragging blocks around randomly, but there is a faster, smarter way to clean up your design using Squarespace’s built‑in layout tools.
How to access layout tools in Squarespace
Open Pages
Select a page
Click Edit
Switch between Desktop and Mobile
Fix mobile first so your saved sections stay clean everywhere
Mobile formatting controls how your sections stack, how your spacing behaves, and how your saved sections look when reused across your site. When you clean up mobile first, your entire website becomes easier to read, easier to navigate, and easier to trust.
How to save and reuse sections
Open any page
Click Edit
Hover over a section
Select the three dot menu
Click Save as Section
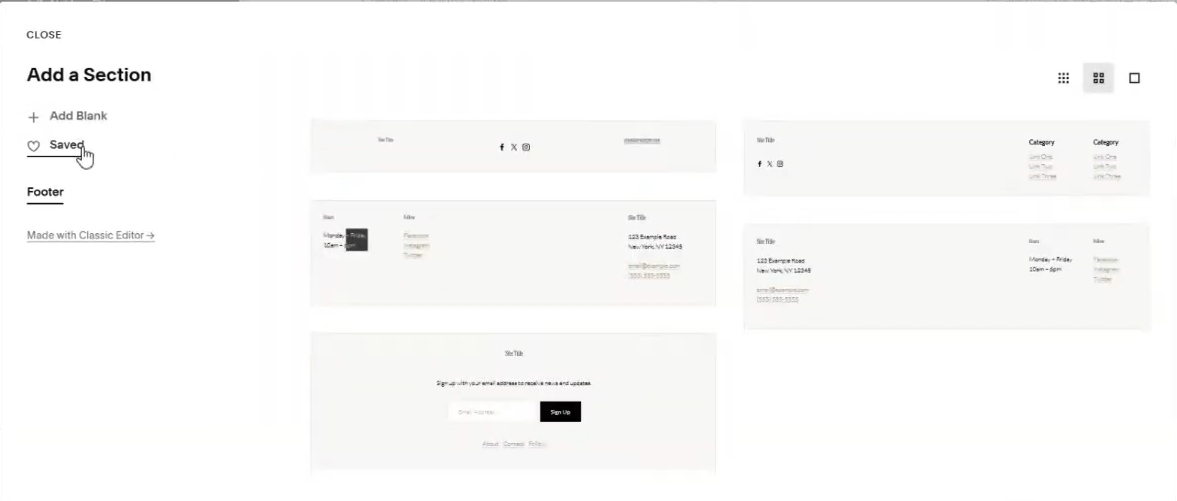
Add it later through Add Section then Saved
Use Saved Sections in Your Footer for Site‑Wide Consistency
Saved sections help you reuse your best layouts across your entire site. This keeps your branding clean, your design consistent, and your workflow simple. One of the most powerful ways to use saved sections is to place them inside your footer so they automatically appear across every page.
Why this works
Your footer is a global section. Anything you place inside it will pull across your entire website. When you add a saved section to your footer, you only have to update it once and the changes will appear everywhere. This is perfect for things like:
Testimonials
Call to action blocks
Contact information
Mini galleries
FAQ snippets
Social proof
Important note about the “i” icon sections
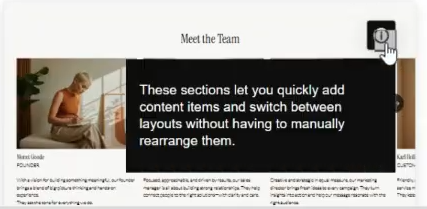
Some Squarespace premade sections have a small “i” icon next to them. The “i” stands for Information, and it means the section is an Auto Layout or Gallery section. These sections dynamically generate and arrange content like lists, products, or images using preset layouts instead of manual drag‑and‑drop blocks.
Because of that, they cannot be saved or added to your footer. Squarespace locks their structure to protect the layout.
But they can be added throughout your site as regular sections. They are great for areas where you want content to update automatically.
The pro tip
Use saved sections for anything you want to repeat across your site. Use “i” icon sections for dynamic content that updates on its own. When you know the difference, your site becomes cleaner, more consistent, and easier to manage.
Use Dropdowns and Funnel Pages to Reduce Decision Fatigue
How to edit your navigation
Go to Pages
Edit the Main Navigation
Keep one primary button
Use Folders to create dropdowns when needed
We talked about decision fatigue and how too many buttons can overwhelm visitors. One clear primary button works best, but you can still organize your content in a way that feels easy to navigate. Dropdown menus are one of the simplest ways to do this.
How to create a dropdown in Squarespace
Go to Pages
In the Main Navigation, click Add Folder
Name the folder (for example: Services, Resources, or Learn)
Drag pages into the folder to create the dropdown
Keep your primary button separate so it stands out
Why dropdowns help
Dropdowns keep your main navigation clean while still giving visitors access to important pages. Instead of showing five or six links across the top of your site, you can group related pages under one menu item. This keeps your design simple and helps visitors find what they need without feeling overwhelmed.
Adding links inside your dropdown
To add a link:
Click Add Page
Select Link
Paste the URL
Drag it into the folder
You can add any type of link inside a dropdown, including:
Internal pages
External links
Blog categories
Contact forms
Booking pages
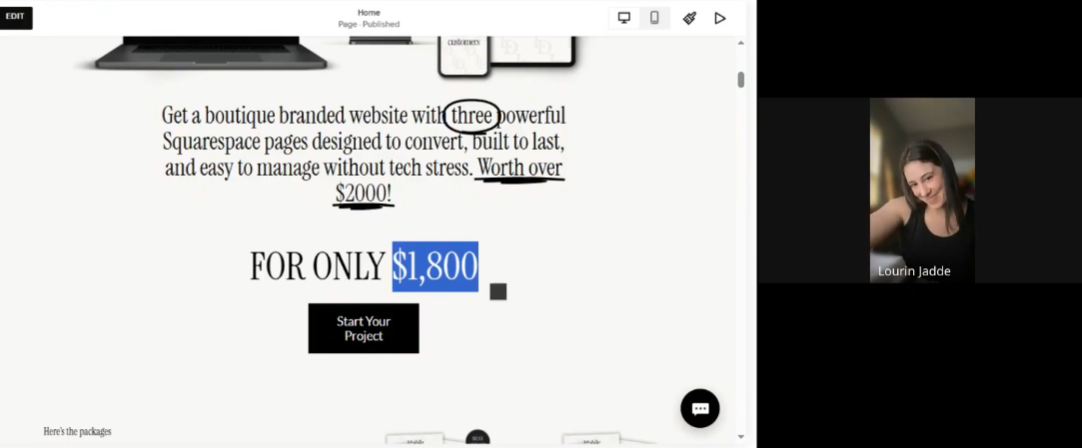
Funnel pages
Using funnel pages for specific outcomes
Funnel pages are focused, distraction‑free pages designed to guide visitors toward one clear action.
They work well for:
Booking a service
Signing up for a workshop
Downloading a free resource
Requesting a quote
Joining a waitlist
When you place funnel pages inside a dropdown, you create a clean pathway for visitors who are ready to take action without cluttering your main navigation.
Why this strategy works
Your main navigation stays simple
Visitors can still find everything they need
Funnel pages get more focused traffic
Your site feels more intentional and easier to use
AI tools help you write clear, search‑friendly content without spending hours on manual edits. During the Squarespace Cleanup Session, we talked about how AI can support your writing, but it only works well when you understand the core SEO rules behind strong website content. When you pair AI with the right strategy, you get content that is human, helpful, and optimized for search.
Use AI Tools to Strengthen Your SEO and Write Clear, Search‑Friendly Content
Using AI to improve SEO titles, descriptions, and alt text
Below is the exact SEO framework we reviewed together, written in a simple, practical way you can use for every page, blog post, and section on your site.
Search Term Alignment
Search engines need to understand what your page is about. This is where keywords come in, but they should always feel natural.
Use the real words people search for
Include your main keyword in the title, H1, first paragraph, and at least one H2
Use natural variations and synonyms
AI can help you brainstorm keyword variations or rewrite a paragraph to include your main keyword without sounding forced.
People‑First Content
AI can help you write faster, but your content still needs to feel human. The goal is to create content that builds trust and helps your audience understand what you offer.
Write for humans first
Make the content helpful, clear, and trustworthy
Use natural language that sounds like you
If you ever feel stuck, ask AI to rewrite your content in a warm, human tone that matches your brand voice.
On‑Page SEO Essentials
These are the technical pieces that help Google read and rank your content.
Clear H1
Organized H2 and H3 structure
Meta title and meta description
Alt text for images
Internal links to relevant pages
AI can help you generate SEO titles, descriptions, and alt text in seconds. Just make sure the final version still sounds like you.
Paragraph Style
Clean, skimmable writing keeps readers engaged and helps Google understand your content structure.
One topic per paragraph
Short paragraphs that are easy to skim
Strong first sentence that states the main idea
Natural keyword placement
If a paragraph feels heavy, ask AI to break it into shorter, clearer sections.
Technical SEO Basics
These behind‑the‑scenes details help your site load quickly and perform well.
Mobile‑friendly formatting
Fast‑loading content
Clean URLs
AI can help you identify slow or confusing sections by analyzing screenshots of your analytics or layout.
Site Clarity and Crawlability
Your website should be easy for both humans and search engines to navigate.
Clean, logical structure
Clear navigation
No duplicate content
If your site feels cluttered, AI can help you rewrite or reorganize content so it flows better.
Trust and Authority
Your content should show expertise and confidence. This helps both your audience and Google trust your site.
Add helpful details that show expertise
Use clear, confident language
AI can help you refine your tone so your content feels polished and professional.
Content Quality
High‑quality content is complete, helpful, and easy to understand.
Complete paragraphs that fully explain one idea
No fluff or filler
No keyword stuffing
AI is great for expanding thin content or simplifying overly complex writing.
Alt text is a short description that tells Google and screen readers what an image shows. It improves accessibility and helps your website rank higher in search results. Strong alt text also helps your images appear in Google Images and Pinterest searches, which is especially helpful for service providers, creatives, and anyone who relies on visuals to attract clients.
Create Strong Alt Text and Batch Your SEO Updates the Smart Way
Most people add alt text one image at a time, which takes forever. During the Squarespace Cleanup Session, we talked about a faster, smarter way to do this using AI and a simple image‑organization workflow.
Step 1: Create a Folder With All the Images You Use on Your Website
The easiest way to batch your alt text is to gather all your website images in one place.
Option A: You already have a folder on your computer
Perfect. Just upload that folder into your AI tool of choice and generate alt text for everything at once.
Option B: You do NOT have a folder yet
You can rebuild your image library directly from Squarespace.
How to download your images from Squarespace
Go to Pages
Open any page
Click Edit
Click each image
Select Replace
Click Download
This saves the original file to your computer.
Option C: Use screenshots if needed
If an image cannot be downloaded, you can:
Take a full‑size screenshot (instructions earlier in this blog)
Or use Print Screen on Windows
Or use Shift + Command + 4 on Mac
Screenshots still work for generating alt text because AI can “see” the image.
Step 2: Upload All Images Into Your AI Tool at Once
Instead of writing alt text one by one, upload your entire folder into your AI tool. This lets you generate all your alt text in a single batch.
What to include in your prompt
Your prompt should tell the AI:
What your business does
Who your audience is
Your location
Your main keywords
The tone you want
This helps the AI generate alt text that is accurate, SEO‑friendly, and aligned with your brand.
Step 3: Add All Your Alt Text in Squarespace at Once
Once you have your alt text ready, you can upload it quickly inside Squarespace.
How to access alt text in Squarespace
Click Edit on any page
Click the image
Select Edit
Open the SEO Alt Text field
Paste your new alt text
Save your changes
Repeat this for each image on the page. Because you already generated everything in one batch, this step goes much faster.
Examples of Strong Alt Text
Here are examples you can use as inspiration. These follow SEO best practices and use real keywords people search for.
Creative businesses
“Graphic designer creating a feminine brand identity for a women owned business”
“Mixed media artist painting abstract floral artwork in Kansas City studio”
“Handmade jewelry displayed on neutral background for ecommerce product listing”
Service‑based businesses
“Kansas City permanent makeup artist applying powder brows for women over 40”
“Licensed therapist offering virtual mental health sessions for busy professional women”
“Brand photographer in Overland Park capturing lifestyle portraits for small business owners”
Wellness and beauty
“Esthetician performing dermaplaning treatment for glowing skin”
“Yoga instructor leading beginner class in Kansas City studio”
“Clean skincare products arranged on marble countertop for flatlay photo”
Hospitality and local businesses
“Cozy Kansas City Airbnb bedroom with natural light and modern decor”
“Local coffee shop in downtown KC serving latte with foam art”
“Boutique storefront in Overland Park featuring summer clothing collection”
AI Prompt Examples You Can Copy and Use
These prompts are written exactly how you should speak to AI for the best results.
Prompt for creatives
“Write alt text for these images that describes what is visually happening. Include my location, my style, and the type of clients I work with. Keep it natural and search‑friendly.”
Prompt for service providers
“Generate SEO‑friendly alt text for these images. I am a [your profession] in [your city]. My audience is [your audience]. Use clear, human language and include keywords people search for. Keep each alt text under 140 characters.”
Prompt for hospitality
“Write alt text for these Airbnb and interior photos. Describe the room, style, lighting, and location. Keep it warm and SEO‑friendly.”
Prompt for product‑based businesses
“Create alt text for these product photos. Include the product type, color, material, and who it is for. Make it helpful for Google and Pinterest.”
Why This Workflow Saves You Hours
You organize your images once
You generate all your alt text at the same time
You paste everything into Squarespace in one session
You avoid the slow, one‑image‑at‑a‑time process
You improve your SEO across your entire site in under an hour
This is the exact workflow I use for client projects, and it is one of the fastest ways to improve your website’s visibility.
Connecting Squarespace to Google for Better SEO
Connecting your site to Google Search Console helps Google index your pages faster. It also gives you real data about search terms, page performance, and visibility. This is one of the easiest ways to strengthen your SEO.
How to connect Squarespace to Google Search Console
Log into your Google Workspace account
Go to Google Search Console
Click Add Property
Enter your full website URL
Choose URL Prefix
Select Verify with HTML Tag
Copy the tag
Go to Squarespace
Open Settings
Click Developer Tools
Open Code Injection
Paste the tag into the Header section
Save
Return to Google Search Console and click Verify
How to adjust Size and Space
Click Edit
Select any block
Open Design
Open Size and Space
Adjust padding and alignment
Technical Tips We Practiced Together
Using the Size and Space panel
This tool helps you clean up alignment and spacing so your layout feels intentional.
Even spacing is one of the fastest ways to make your site feel elevated. When your text blocks, images, and buttons all have equal padding, your layout feels cleaner and easier to read. This is especially important on mobile, where uneven spacing becomes very noticeable.
Use Positioning to Make Your Layout Look Clean and Professional
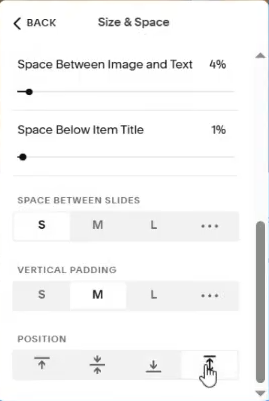
Positioning is one of the quickest ways to make your sections look balanced.
During the Squarespace Cleanup Session, we used the Position tools to control how content sits inside a section so everything feels aligned and intentional.
Most people never see this tool because it is hidden at the very bottom of the Size and Space panel. You have to scroll all the way down to find it.
What each Position option does
Align Top moves your content to the top of the section
Align Middle centers your content vertically
Align Bottom anchors your content to the bottom
Distribute Vertically spaces items evenly so everything feels balanced
How to adjust Positioning
Click Edit
Select any block
Open Design
Open Size and Space
Scroll all the way to the bottom
Choose your Position option
Use Squarespace ID Finder to Target Sections for Custom Code
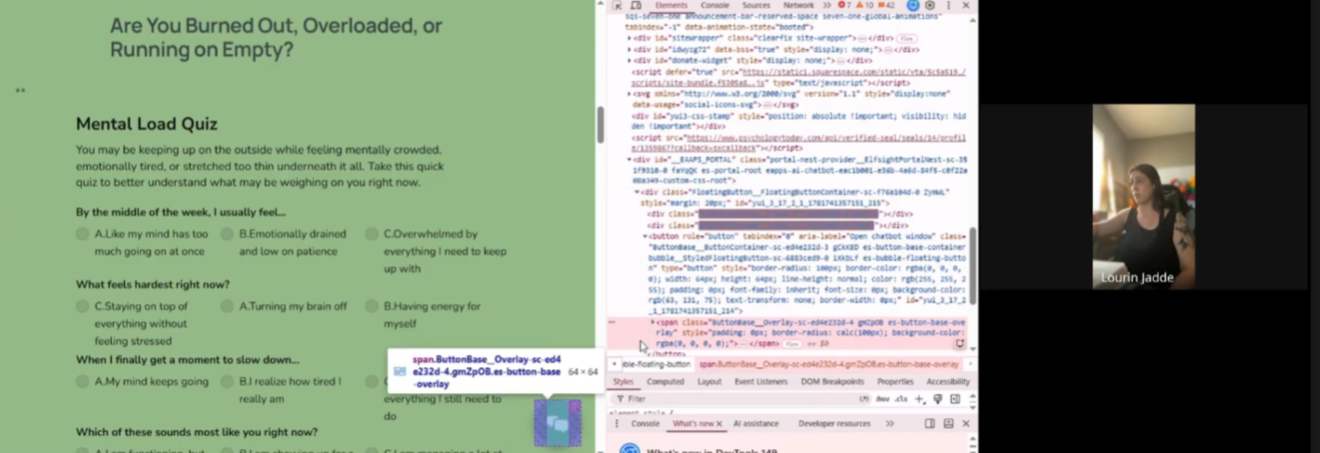
Squarespace ID Finder is one of the most helpful tools for anyone who wants to add custom code to specific sections or blocks. During the Squarespace Cleanup Session, we used it to quickly identify section IDs so you can style or adjust only the areas you want without guessing.
Most people try to hunt for IDs inside the code inspector, which is slow and confusing. This Chrome extension makes it simple. You hover your mouse and the ID appears instantly.
Where to get it
You can install it directly from the Chrome Web Store: https://chromewebstore.google.com/detail/squarespace-id-finder/igjamfnifnkmecjidfbdipieoaeghcff?hl=en
How to use it
Install the extension
Open your Squarespace site in Chrome
Hover over any section or block
The ID will appear on the screen
Copy the ID and use it in your custom CSS
Why this matters
Custom code only works when it is attached to the correct section or block. Using the wrong ID means your code will not apply or will apply in the wrong place. Squarespace ID Finder removes the guesswork so you can confidently target:
Specific sections
Individual blocks
Buttons
Galleries
Banners
Footers
Pro Tip: Pair this with saved sections
Once you know the ID of a section, you can style it consistently across your site. Just remember that sections with the small “i” icon are Auto Layout or Gallery sections. These cannot be saved or added to your footer, but you can still target them with CSS anywhere else on your site.
Keeping animations simple
Too many animations slow down your site and distract visitors. Simple is better.
Where to adjust animations
Click Edit
Select a section
Open Background or Animation
Choose simple animations or none
How to Take Full Page Screenshots
Windows
Open the page
Press Ctrl + Shift + I
Press Ctrl + Shift + P
Type screenshot
Select Capture full size screenshot
Mac
Open the page
Press Command + Option + I
Press Command + Shift + P
Type screenshot
Select Capture full size screenshot
Final Thoughts
This session was full of smart questions, helpful ideas, and real examples from your websites. Whether you joined live or are catching up through this blog, I hope these tips help you feel more confident updating your site and understanding how Squarespace works behind the scenes.
If you want help applying any of these updates, feel free to reach out. I love supporting women who are building strong, beautiful digital homes for their businesses.
Catch up on All My Blogging Related Blog Posts Here.
You’ll Also Love


Hello, world! I’m Lourin. I’m a Kansas City mama, creative, and website designer who loves helping small businesses and community leaders show up with clarity and confidence. Here on the blog you can read about my favorite things, like small business growth, simple website tips, community stories, and the behind‑the‑scenes of building a life and business I love. So glad you’re here!